Advanced Setup
Details for the Installation: manual flashing, what the display asks, setups without HACS or with an MQTT broker, and older displays.
Manual Flashing
If the browser installer is unavailable, use Espressif's Flash Download Tool or esptool. This alternative is for a first installation or full reset and erases all settings. Export your dashboard first if needed.
- Download the exact device's
_factory.binfrom the latest release. Match the complete model and revision; V1/V2, LCD-7/LCD-7B and P4/S3 images are not interchangeable. -
In Flash Download Tool, select ESP32-P4 or ESP32-S3, UART, and the USB port. Erase the flash, then write the factory file at
0x0. Alternatively, with esptool installed:python -m esptool --port COM3 chip-id python -m esptool --port COM3 write-flash --erase-all 0x0 your_device_factory.binReplace
COM3with your serial port (for example/dev/ttyACM0on Linux), and the filename with your downloaded factory image. -
Wait until verification finishes, then restart the display.
ESP32-P4 revision check: standard P4 images require pre-v3 silicon (revisions 1 to 199). The experimental Waveshare 7B and 10.1 _rev3 images and the Guition JC8012P4A1 V3 image are for v3.1 and newer, including v3.2. Check the chip-id output before a manual write. esptool does not enforce HomeTiles' narrower revision checks.
Never write a plain update .bin at 0x0. To preserve settings, use the browser's Update mode or Firmware Updates.
Flashing Problems
- No serial port: use a data cable, try another USB port, and close other serial monitors or flashing tools.
- Cannot connect: hold BOOT while connecting, then release it when the connection starts.
- Wrong chip or revision: recheck the device label and selected model; do not bypass the check.
- Interrupted installation: reconnect and repeat the selected operation. An interrupted Update keeps the previous app; an interrupted factory reset needs a complete factory installation.
For a blank display after flashing or connection problems after setup, see Troubleshooting.
The First-Start Setup
A new display opens a setup in four steps. You can leave it at any time and finish it later under Settings → System → Setup.
- Basic settings: language, time zone, light or dark theme, and the rotation. New ESP32-P4 displays that can stand upright also ask for landscape or upright.
- Connect to WiFi: choose your network. Without a network, switch on Hotspot and set up the WiFi from your phone (password
12345678). - Add to Home Assistant: tap Pair; the display can be found for two minutes. Home Assistant shows Panel found, then the same six-digit number as the display. Confirm it in Home Assistant with Numbers match: connect and on the display with Confirm.
- Add your tiles: the address of the Web Admin; open it in your computer's browser.
Pairing
Pairing needs no password: the display accepts it only within the two minutes after you tapped Pair, so only someone standing at the display can pair it. Afterwards Settings → System shows Home Assistant: Connected with Direct · Bridge and its address, and Pairing: Paired.
The display connects to Home Assistant on TCP ports 8140–8147, camera tiles additionally on 8124–8131. If your network separates them, allow these ports from the display to the Home Assistant host. Home Assistant finds the display by mDNS, so both need to be in the same network.
To unpair, open Pairing under Settings → System → Security on the display and tap Unpair, or use Security in the Bridge options; the other side follows. An unpaired display counts as a new display and can be paired again.
Choosing Entities
With a Web Admin password, the entity picker of a paired display finds every entity in Home Assistant. Set it like this:
- On the display, open Settings → System → Security and tap Allow next to Web Admin password.
- Within two minutes, set the password in the Web Admin under Settings → System.
Without a password, the picker offers only the entities selected under HomeTiles Bridge → Configure → Entity configuration. For Energy tiles, also enable the electricity, gas or water category under Configure → Energy Dashboard.
Security
| Protection | What it does |
|---|---|
| Pairing | Every message between display and Bridge is encrypted and signed, commands as well as states. A recorded command cannot be sent again. |
| Web Admin password | Only you can change the dashboard and the display's settings. |
| Locks and alarm panels | Work only on a paired display with a Web Admin password. Home Assistant checks their codes; see Lock. |
| PINs | Settings and folders can ask for a PIN on the display. This is a child lock, not a login. |
Multiple Displays
Pair each display the same way. Every display becomes its own device of the HomeTiles Bridge and gets its own topic name automatically. Entity selections in the Bridge options are shared by all displays.
Without The Button
Add it to HACS by hand: in HACS, open Custom repositories from the menu, add https://github.com/GalusPeres/HomeTiles-Bridge as an Integration, download HomeTiles Bridge, and restart Home Assistant.
Without HACS: copy custom_components/tab5_lvgl from the Bridge repository into Home Assistant's custom_components directory and restart.
Moving From MQTT To The Direct Link
A display set up over MQTT with an older version keeps working after the update. To move it to the direct link:
- Update the Bridge to v0.9.0 and the display to HomeTiles v0.9.0.
- On the display, tap Pair under Settings → System → Security.
- Home Assistant shows Connect the panel for the existing device. Select Submit and compare the number.
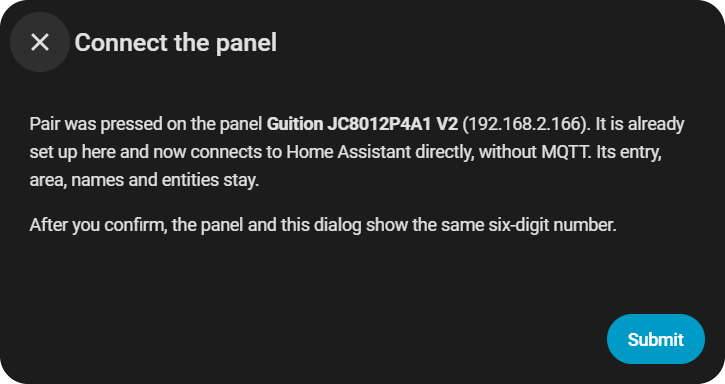
The device keeps its entry, area, names and entities. The MQTT settings stay saved on the display but are no longer used. Encryption that was set up over MQTT is replaced by the pairing of the direct link.
Using An MQTT Broker
The direct link needs no broker. If you prefer MQTT, for example to use the display's topics elsewhere:
- Install an MQTT broker. On Home Assistant OS, install the Mosquitto broker app under Settings → Apps, start it, and add a Home Assistant user for it under Settings → People → Users. Confirm the discovered MQTT integration. Other installations: see the official MQTT setup.
- Open the display's Web Admin, go to Settings → System → MQTT, and enter the broker's IP address, port
1883, username and password. With the Mosquitto app, use the Home Assistant machine's IP, notcore-mosquitto. Keep the suggested Device topic base and Home Assistant prefix. - Select Save. Home Assistant shows Panel discovered under Settings → Devices & services; select Add.
Without discovery, add the panel under Add Integration → HomeTiles Bridge with the same topic base and prefix. Pairing always uses the direct link: tapping Pair moves an MQTT display to it.